A couple of years back I found a drone, complete with all its accessories and bag etc in the trash. Someone had thrown it away because one of the propellers didn't work, and the reason it didn't work is because one of the wires connecting it to its motherboard had come loose. After 30 seconds with a soldering iron and a meter, it was back up and running again, and I had a complete drone with kit for free.
Since then, it has taken a few more knocks - one time it got stuck in a tree after an unexpected gust of wind and came crashing to Earth whilst I went to get a long pokey stick to help it down. But overall I have been able to keep it in good working order, despite some cosmetic damage.
Sadly though, after some storage over the winter, I have discovered that the batteries for both the drone and its controller now seem to be unable to take a charge. I did think that this could happen for the controller, as the battery cannot be easily removed from it - but the drone battery pack is removable for recharging and storage. It was disconnected from the drone when it went into the cupboard in December, so I am a little unsure as to why it is behaving this way...
I am going to start with what I think is the easy win right now, the controller.
 |
| Partially disassembled controller |
The first thing we need to do is extract the battery from within the controller itself. It sits within a cage that also has the antenna hot glued to it. When I first rescued this drone, the controller had these big, flat, folding antennas on each corner. Once I got into the controller itself, I discovered that they were ornamental - they were just pieces of plastic, so I took them off and binned them.
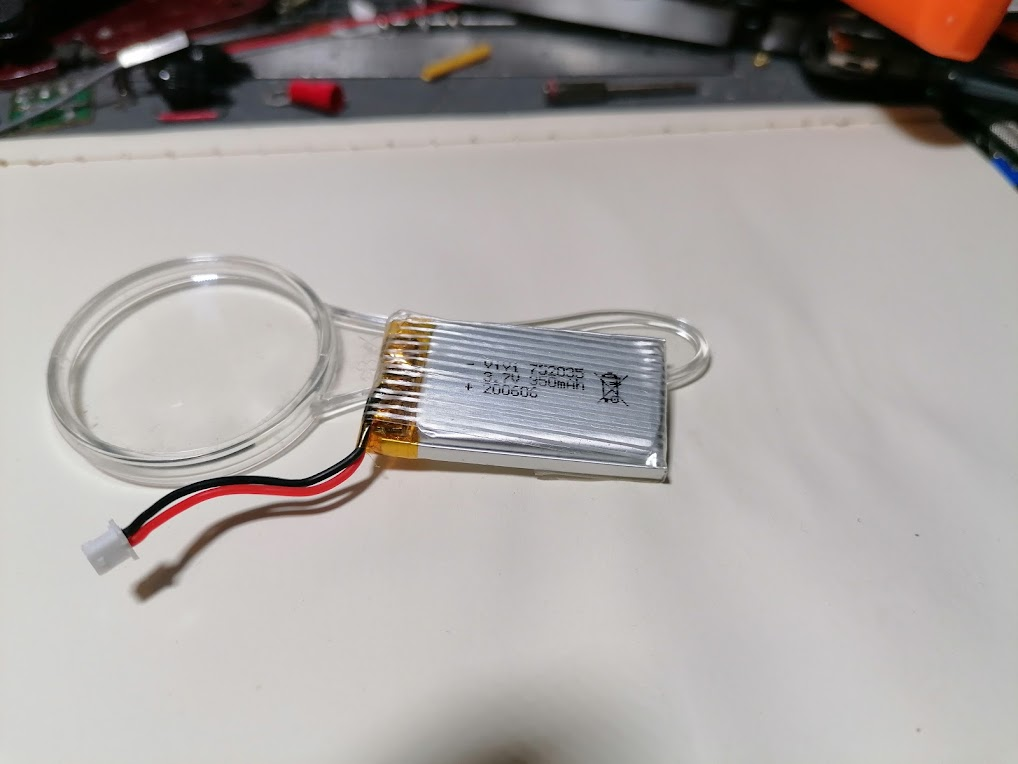
With the battery out, I need to measure its current voltage. As the label suggests, this is a 3.7 volt 350 mAh battery, so we want to see something near this value when it is working correctly. As I am typing this, I haven't measured anything, so at the present time I think it is going to be pretty low...
 |
| The controllers internal batter |
After measuring the battery on the meter, I was very surprised to discover see 4.26 volts come up on the display. So much so that I measured it again on a different meter - and got the same measurement again. This is very strange, one of the features on the controller is a strip of LED's that provide a battery status. When connected to the power, they also act as a charge indicator. Before opening the controller, the LED's were flashing in a specific pattern, but with only two of them lit. As one of them was orange, I assumed that this was the charge/on light.
This means that it might not be an issue with the battery charging in the controller, it could indicate a larger problem with the controller itself. I dont know if these types of battery can be "over-charged", or if the existing battery is damaged, so its probably a good idea for me to go ahead and replace it any way. And if I am going to replace it, why dont I increase the battery capacity at the same time? On the original battery I got about 20 minutes of flight time. The drone itself can last a little longer, but having a higher capacity battery on the controller would be incredibly useful.
Going through my current battery collection, I discovered a 3.7 volt 300mAh which shares an almost identical physical configuration to the original battery. However it is a lower capacity battery at 300 mAh, which would mean even less use time on the controller itself.
But, I have quite a few of these batteries, so why not use more than one to increase the capacity from 300 mAh to 600 mAh?
In pretty much all cheap electrical consumer products, we see multiple batteries being used. Typically these are an even numbered combination of AAA, AA or D cell batteries. These batteries normally provide something between 1.2 and 1.5 volts, however the devices they power often require voltages higher than this or capacity that exceeds that of one single cell.
This is why we have to put batteries in these devices in specific combinations, and each device will require either one of two configurations, those being parallel or series. Connecting batteries in series increases the available voltage, so connecting six AA cells in series would give you 9 volts, depending on the cells. Connecting the same number and type of batteries in parallel would give you a voltage between 1.2 - 1.5, depending on the cells, but the capacity will have increased six fold.
To connect two or more cells in parallel, you simply connect the positives to the positives and the negatives to the negatives. With this done, you have increased the capacity by creating a battery pack. To connect the batteries in series, you connect negative to positive etc. Once done, you will have increased the voltage by again creating a battery pack. This is the reason why we place batteries in devices pointing in a specific direction.
For my purposes though, I will be connecting two of my 300 mAh batteries in parallel for the reasons described above. The following image best describes what I need to do in order to achieve this:
 |
| Connecting batteries in parallel with strip board |
Unfortunately, my two replacement batteries cannot be squeezed into the existing battery cage - and I dont want to make any physical changes to it as it acts as the antenna holder as well. However, there does seem to be plenty of space in the controller for these to be held in place with some command strips. However, I can use the holder to take care of a piece of stripboard to handle the connection to the controllers mainboard.
I actually find that drawing things out on a piece of strip/perf board helps me with routing tracks and any jumper wires I might need to put in. I also dry fit the components to help me realise the orientation and correct placement for them. Using Fritzing, the application I used to generate the previous image, helps a lot. But when you cannot find the same part you are using for real in its menus, getting your actual board realised needs some planning. I used some copper tape to indicate where I need to join tracks, and have also marked where tracks need to be cut. The copper tape isnt great as a conductor on its own, but you can use it for a continuity test. There would also be a jumper on the reverse to join the two upper tracks, however I have omitted this.
 |
| The completed battery board ready to go into the controller |
With the board finished and all of the relevant connectors soldered into place, I was able to fit this into the battery cage in the controller. The batteries were fitted into the shell of the controller and I rebuilt it enough for it to be able to go on charge. I was pleasantly surprised to see that once it was connected up to a USB C cable, the controller began to charge the batteries. So I went ahead and put the whole thing back together.
 |
| the battery board and batteries installed in the controller |
After about an hour, the charge light went off and I decided to turn the controller on to see how we were doing.
Sadly, even after replacing the batteries, the controller refused to work correctly. It was showing the same flashing LED's - which I think must be an error code - as it did with the previous battery.
So thats one dead controller...
Next up is the main battery for the drone itself. This charges via a USB adapter that was in the case when I found it. This is pretty essential, as without it I would have been pretty much unable to charge the main battery. Whilst charging, the LED's on the battery are supposed to light up and indicate the charge level. However now, they are completely dead.
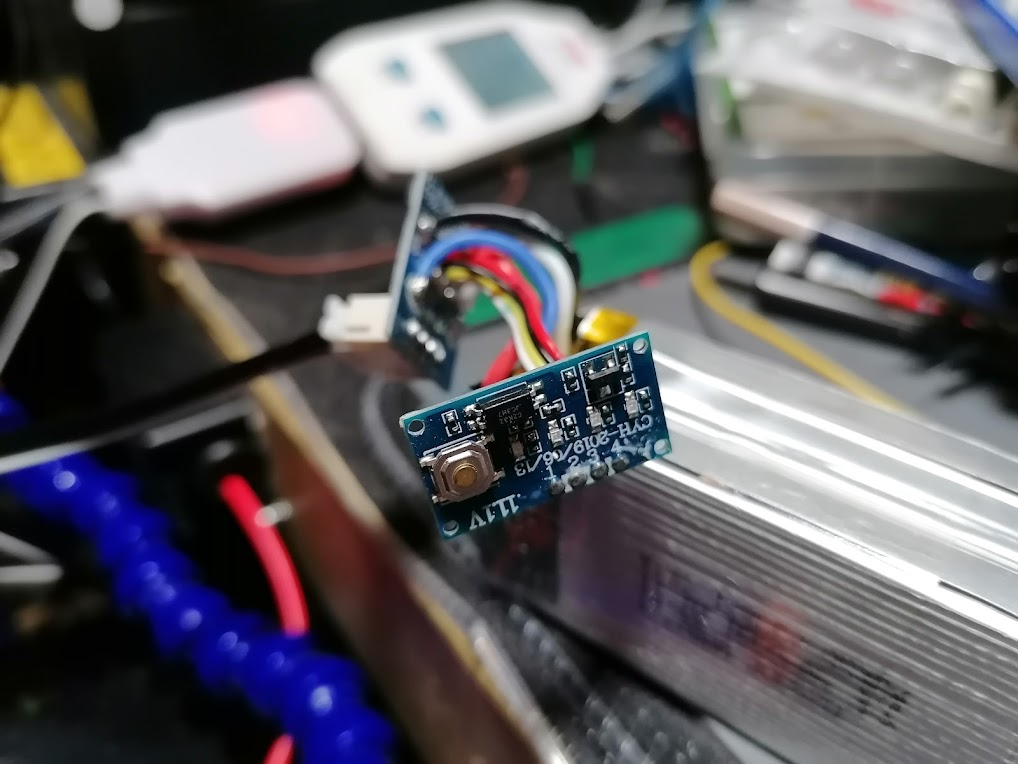
The battery is marked as 11.1 volts with a capacity of 1600mAh. It also states that it can deliver 17.76 Wh of power. These are pretty capacious batteries for two reasons - they supply power both to the avionics and to the propellers. The propellers will use the majority of the available power for achieving flight.
I hooked the charger up to my USB meter, this is a really useful tool for looking at what takes place over a USB connection. It can be used to measure the voltage, current and power being used by a device that charges over USB as well as monitor the same over the D+ and D- lines. However I noticed that whilst the batter was connected to the charger, there was no power draw. I would expect to see something around 1.5 amps if this battery was charging correctly. This is because the charge cable states it has an output of 11.4 volts and 1.5 amps.
 |
| USB meter used to monitor power draw |
The only other thing I could do at this point is to check the internals of the battery itself. Within, I found that there were three 11.1v cells connected together, given the parameters of the battery that I already knew I assumed that they were connected in parallel, in the same way I approached the controller. But of course, this batter has circuitry that is much more complex.
I think its probably a good point in time to state that working on a battery like this is not a trivial matter. The risk of shock is high, and whilst not that dangerous to you, it could be painful. However, the risk of rapid battery failure in the form of smoke, flames and explosion - and I am not kidding here - is pretty high when you are dealing with a something like a battery pack that will no longer charge. Its always a good idea to have a flame proof container like a biscuit tin, or oven pan to hand so that you can quickly dump a failing battery. One time I opened a battery pack that had taken a knock ended up with one of the cells rapidly expanding and becoming scorching hot with seconds.
 |
| The exposed battery pack |
After getting the pack out, I checked for any obvious damage to the cells themselves. If you see a LiPo with damage to the edges then be wary, its often ones that have been bashed on the edged or corners that like to go nuclear. Plugging it back into the charger allowed me to probe around some of the connections.
This helped very little other than to indicate only one of the cells appeared to have any charge, and this was at 12 volts. There was no sniff of power anywhere else on the board at all, none to the LED's or the single button provided.
 |
| The battery packs circuitry |
So sadly, it looks like the charging capability of the battery itself has ceased to work. It is odd that both batteries would go at the same time, especially after being stored in the same way. But I needed to remember that this is a piece of equipment I dug out of the trash and got working again, I dont really know if the initial problems were caused by something else, like a formidable crash.
Where does this leave me? Well, with no drone any more it seems. Unfortunately, I haven't been able to repair any of the damage to my drone at all. Its pretty hard, if not impossible, to find replacement parts as well. This was a mass consumer device made with some specific parts, I can take some bits and pieces off the shelf as replacements, the propellers and motors etc, but the charging is handled by the battery - the cost of one of those right now is almost as much as buying a new drone. So I wont be doing that. Also, the mainboard for the drone is not able to be customised, I cant replace the firmware or anything else on the board at all. Right now, its dead.
Did I learn anything? Well, initially this want an exercise to learn anything new in particular - if anything I have come away from this with more questions about batteries as it turns out that I know less about them than I thought. But one thing I was able to improve on here was my skills in diagnosing potential problems. A list of checks was written down as well as me working back from where the power came in with a meter to see where things went wrong first.
Which is great etc, but now I just dont have a drone 😞